Pages

Showing posts with label Crafts. Show all posts

Wednesday, December 12, 2012

Christmas Lyric Canvas

Carrying on with Christmas decorations from my Christmas Craft list. Today we venture to the two canvases with Christmas hymn lyrics.  Now, I made these in two different ways and got pretty much the same results.


The Simple Supplies:
Lyrics printed out -- I got these prints from Landee See, Landee Do
Knife & Cutting Board
Pencil
Canvas (or two)
Paint colors of choice -- I used a shimmer white as a base coat with Christmas Green and Red for the 'filler' space

The Simplified Steps:
Step One - Paint the shimmer base coat on both canvases

Step Two- Cut your printed lyrics down to the size of the canvas, so it fits in the back of your canvas


Step Three - Hold your canvas (with the paper tucked in the back of it) up to a window or light so you can see through and have the pattern in front of you. Trace the pattern onto the front side of your canvas

Step Four - Paint in the background with your color of choice, covering the pencil markings as you go.

Step Five - After your canvas has dried, hang it up!

Sounds, simple right? How could I have screwed this up and made this take an ENTIRE day, for the first canvas I painted? 


Well, you see, instead of having the genius idea to simply hold the canvas up to light and trace the pattern onto the canvas....I used a knife and cut out all of the letters. This along took a good amount of time. Then with the background pieces, I taped them together on canvas like puzzle.  Next, I finally outlined where every letter would be. These steps again, taking a very long time. Finally I was able to paint in the background.

Boy, am I thankful I was able to come up with the tracing idea for the second canvas, otherwise these two projects probably wouldn't have been worth the time and effort.


Monday, December 10, 2012

Holly Letter

One of the holiday projects on my list to tackle this year is an 'S' made out of holly. It was a fairly simple project and I completed it in one night while catching up on some TV shows we enjoy.

Flat letter -- I got my S from Hobby Lobby
Bundles of fake holly -- I used 7 bundles from Hobby Lobby
Red paint to match holly and paint brush
Glue gun and sticks
Scissors 


Step One - Paint your letter

Step Two - As your letter is drying, trim up all of your holly.  I tried to keep them in the bunches that they were already connected in and also wanted to keep a few individual or pairs of holly together to use as filler at the end.


Step Three - Hot glue your bundles of holly onto the letter, covering the entire piece as best as possible. At the end I still had some holly leftover, so I went back over it and filled in any gaps with the individual pieces. 

Step Four - Touch up the holly with red paint as needed. Some of the red coloring had come off of the holly I was working with, so I hit it up with some paint!

Step Five - Enjoy your work! Hang on a door by itself or with a wreath. Hang it on a wall or lean it up against any other holiday decor you already have!  We are enjoying it, hanging with a wreath on the inside of our front door, so we get to see it often.


Friday, November 09, 2012

Christmas Craft List

I took the whole week of Thanksgiving off this year. We've decided to host Thanksgiving this year so I'll probably be spending the days leading up to Turkey Day by cleaning and prepping some food. My plan is to have at least one day to spend time working on some of the many projects I dream about (thanks to Pinterest). And, depending on how much cleaning I keep up with over the next couple weeks with the 4 Weeks to a More Organized Home series, maybe I'll be able to get even more time in!

So, in true Dani fashion, I'm making a list! I'll make it a big list so I have options to choose from when the days roll around. Hopefully by already having a list and maybe even some shopping done before hand, it will make it much easier to get started! I'll start working on some Christmas projects now, so we actually have decorations when the holiday gets here.

The list/inspiration:

I hope to take two of these printables and turn them into canvases to hang on either side of the window behind our couch.


A holly letter 'S' for the front door


Something similar to this sign that could possibly hang outside, or in the entry. Not quite sure yet what type of material I would use. I think wood would be nice for outside.


I've been dreaming of making a wreath from ornament balls for about a year now. This may be a project that gets put off in hopes that I can score some great deals on ornaments after Christmas.

It would be nice to have a Noel sign somewhere, I'm just not quite sure in what form or where it would go.

So, there you have it! My dream list Christmas crafts to work on during my days off! Hope to keep you updated on how anything that I get done turns out!

Wednesday, November 07, 2012

Fall Decor - Dollar Store Style

Owls have become my go to fun buddy lately. After making this fall craft, We now have three owls in our living room and I'm up to two owl necklaces!

Anyways, onto the craft. These two little guys ended up costing me a whopping $2. I just had to buy the two ceramic owls at Dollar Tree and had the rest of the supplies on hand (paint and glaze).


I simply painted the ceramic owls with one coat of a light grey paint, let it dry, and then rubbed some antiquing glaze all over the owls.

I probably should coat them with some sort of sealer because the acrylic paint can easily be scratched off, but since they are just sitting on our end tables, I'm not in too big of a rush. For now I'm just enjoying the little dudes (or dudettes).


Then to go along with the owls is the glittered pumpkin you see above.  This also only cost $2. One dollar each for the pumpkin and a package of glitter.


I 'painted' sections of the pumpkin with Mod Podge and then dumped glitter over it and repeated until the whole pumpkin was covered in glitter.  To keep the glitter from getting all over the place when the pumpkin is moved I sprayed it with a few coats of clear coat sealer.

So there you have it! A few fun fall decorations on the cheap! :)

Sunday, July 01, 2012

Lake House Gift

Recently, a co-worker of mine had a birthday. I found this to be a great opportunity to craft her a gift -- a project I've been wanting to do, but not sure if the end product is something that I would want to keep/decorate with.


All I needed to do was go out and get some twine or jute or rope. I ran to Hobby Lobby and grabbed the first I could find: jute. I had the rest of the supplies at home: hot glue & a cleaned out wine bottle.

I started wrapping the jute around the bottom of the bottle and worked my way to the top, hot gluing as I went. It was pretty simple, but because the jute is pretty thin, it did take me around an hour to do. But, if you're sitting around chatting or watching TV, why not do something with your hands?

Of course you need to decorate it up with some flowers and a little tag.


Julie loved her gift and we both decided it would be perfect in their home on the lake.

Happy Crafting!

Tuesday, June 26, 2012

Coaster Time

I've finally made coasters after having our nice, new end tables for about 6 months and our revamped coffee table for about a year.

I naturally found this idea on Pinterest. And it's pretty simple, and fairly inexpensive. 
Actually, the most difficult thing for me, was choosing the design I wanted our coasters to be from all of these options


Jesse said he liked the green the best and it was the first paper I picked out, so that's what I went with. Started out by cutting squares to fit the tiles (bathroom tiles on clearance at Lowe's for 35 cents).


Next up was using a few layers of Mod Podge to get the paper good and stuck on the tile.


I was in quite a rush with my last steps and bypassed picture taking. I cut out felt squares and hot glued to the bottom so the tiles had a soft padding when skooching across the tabletops. Then, I sprayed them with a clear coat sealer.

Final step: Enjoy the awesome-ness.

Check out our new pet, Ollie the Owl. He's bringin' in the wisdom to the living room.

Sunday, April 08, 2012

TP Art

Okay, okay, technically it's not toilet paper art, it's toilet paper roll art. Of course this is one of my Pinterest finds and probably one of my first projects that I've completed from Pinterest. I don't even want to count how many more projects I have pinned on there!

I started out by creasing and cutting up our toilet paper rolls (after saving many!). Then I started lining them up until I could find a design I liked best.
 
In the end, I decided to go with one long pattern

I took it outside and went a bit too crazy with the spray paint. This was also my first spray paint project. I went through a full can and had to buy more. It was very difficult for my to get the paint to stick and get in all of the crevices. Maybe I should have painted the pieces before hot gluing them together?

It is currently hanging in out entryway. I like where it is, but not sure if it will stay here for the long haul.


Monday, September 12, 2011

Project Show Off

Okay, I have a few projects that I have done in the past months that I haven't posted about yet. And instead of give you a boring step by step post on each of them (which really would be quite boring), I figured, why not throw pictures of the finished products (and a short commentary) all together in one big Project Show Off post?

Let's Go!
These little guys are very simply (I may have posted about them before) all I did was dump out the flour into another container and framed part of the packages!

They keep our Street Art company and are located right beside the baking supply cupboard.

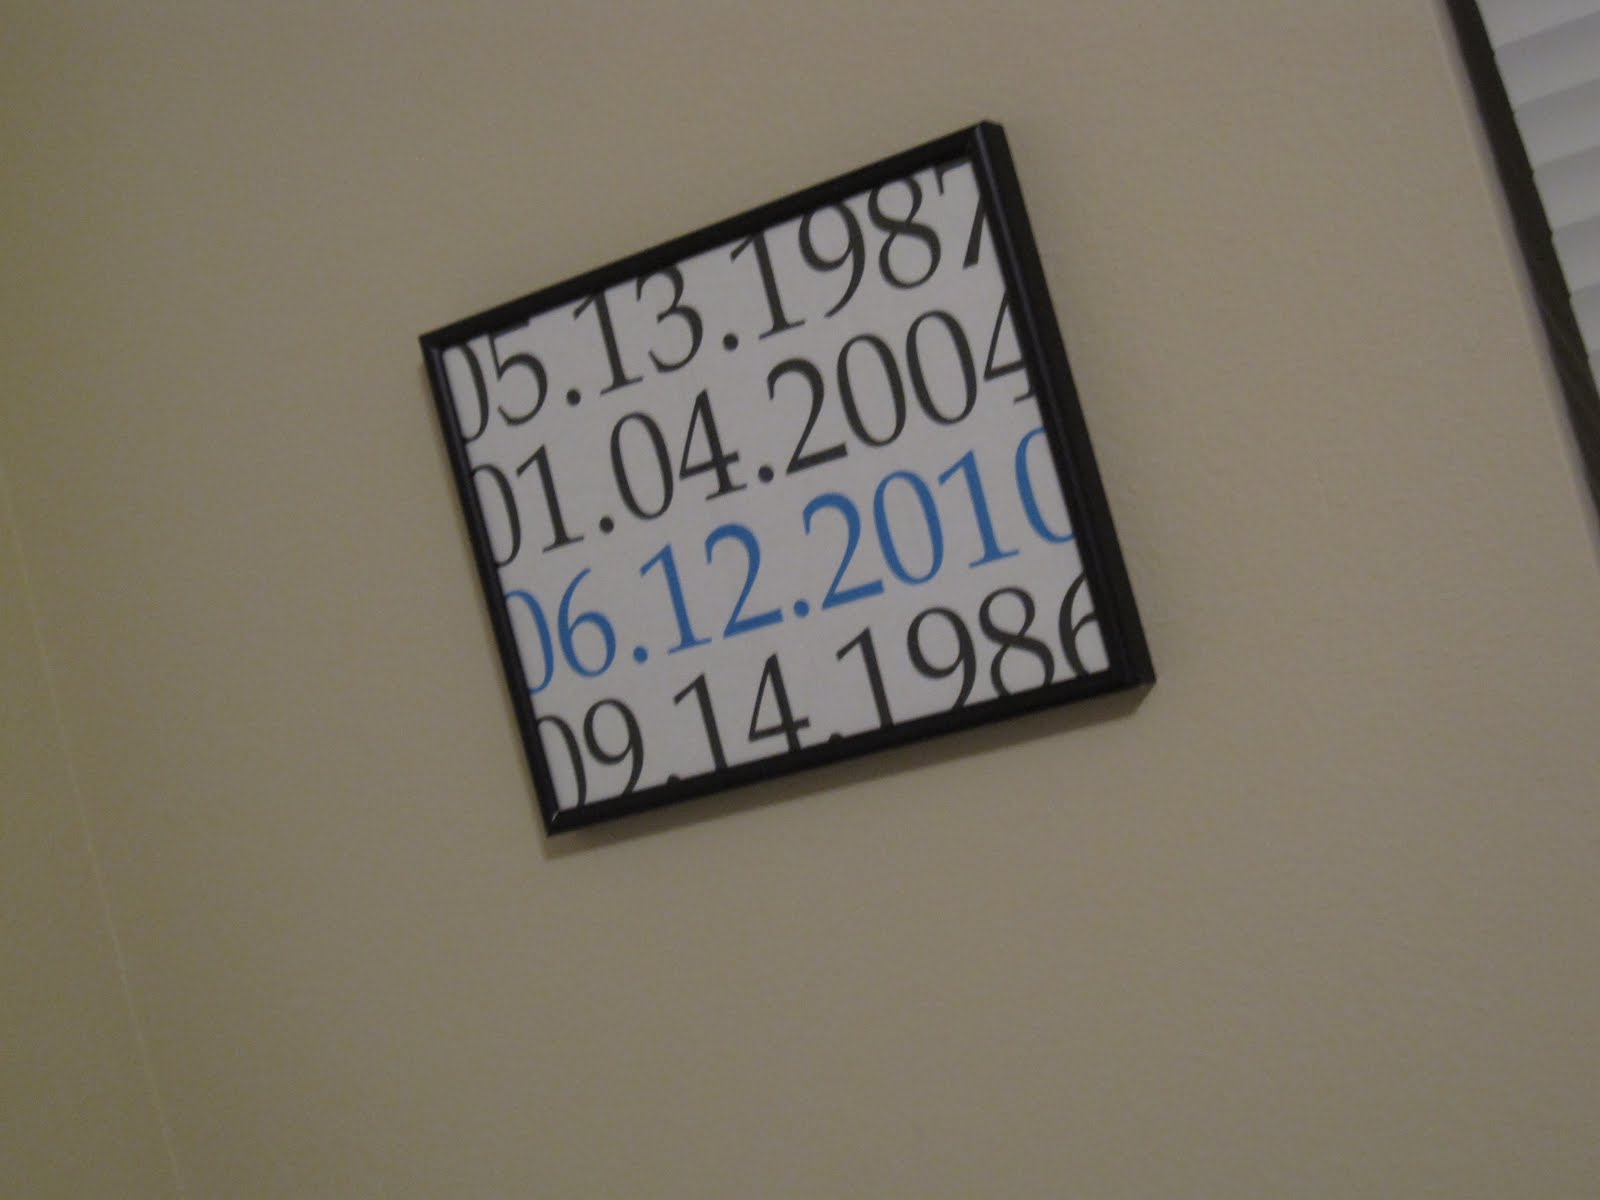
Currently blue is a little accent color in our bedroom, where this frame resides. It includes our birthdays, the date we started dating and our wedding date.

These doo-hickies, if you haven't guessed, are our initials. I cut the letters out of some cardboard boxes and hot glued pretty yarn all the way around them. They also hang in our bedroom.

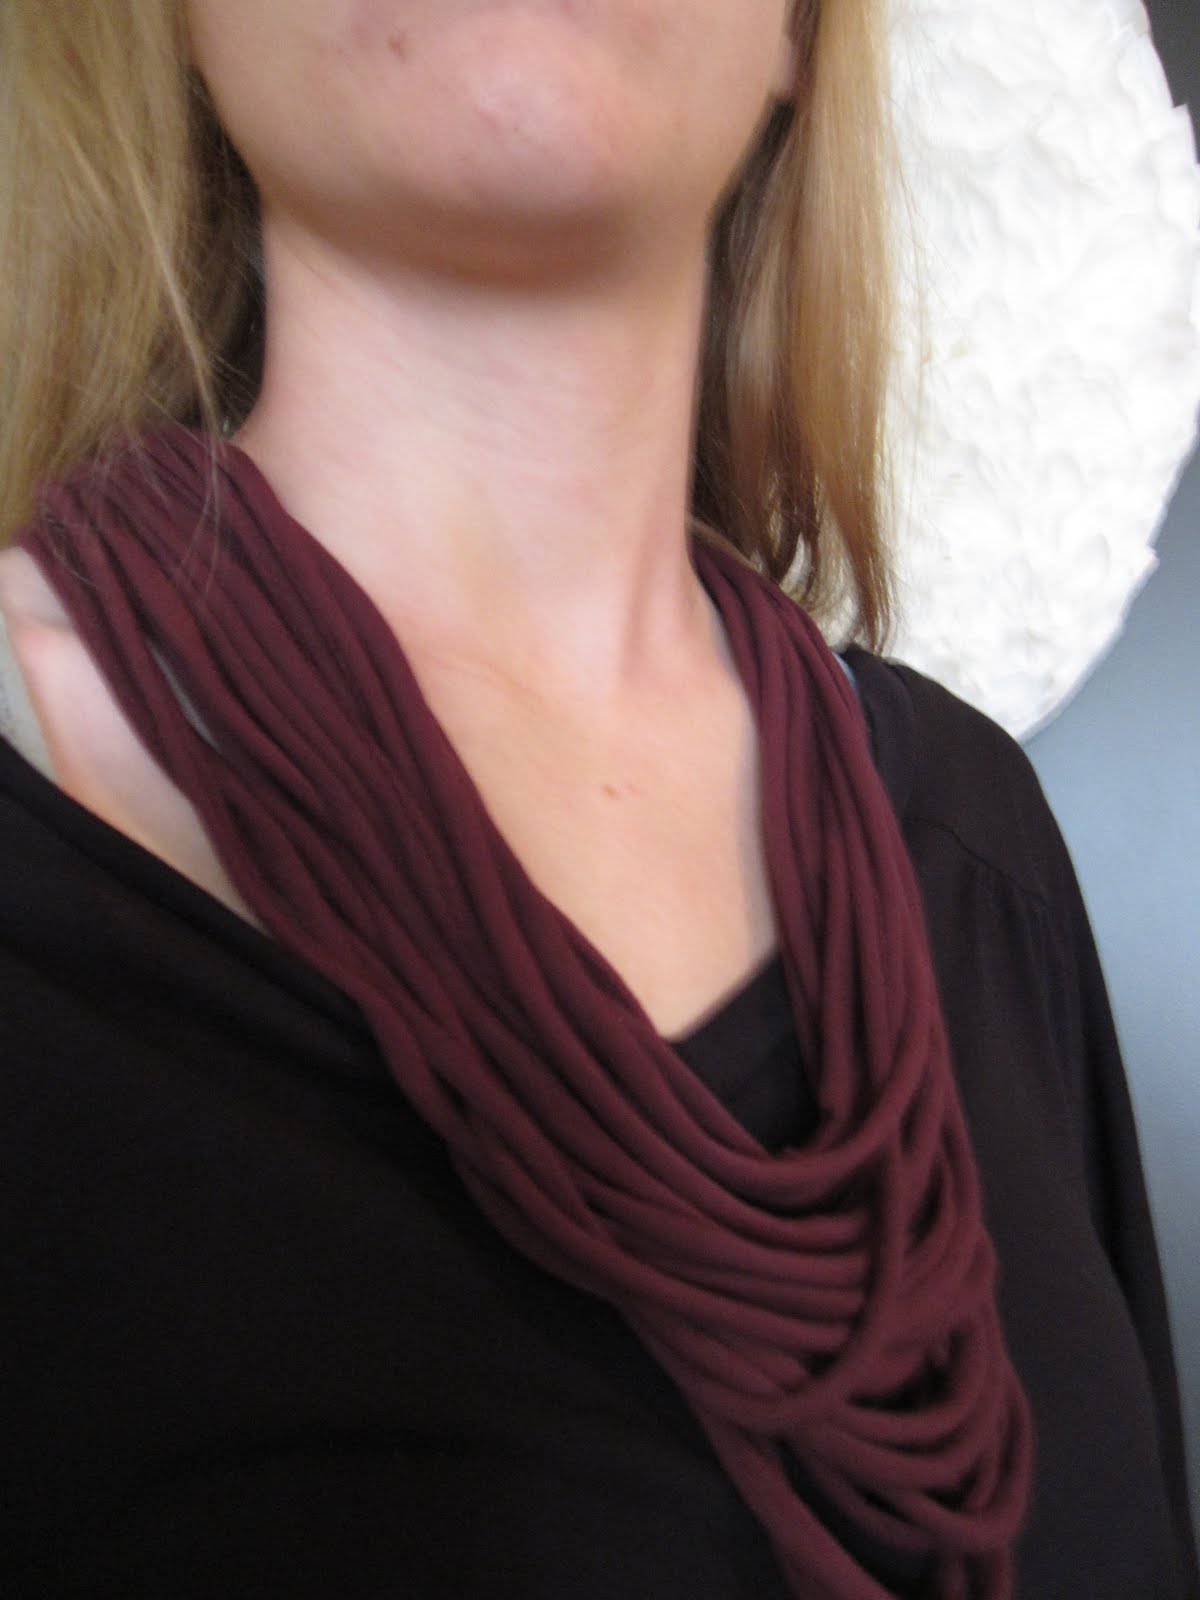
I may or may not have purposefully cropped my face out of this picture....but I want you to focus on my awesome new necklace, concocted out of one of Jesse's old shirts. 

And this little guy was slightly a beast to finish. It use to be all black, and was just a cheap end table I bought from Target years ago, probably only $10. It's not made out of real wood, just pressboard, but I decided to try to sand it down. {Pain} Then I bought some colors I liked and painters tape. Slapped a few dozen (okay, maybe not quite that much) coats of the base color on. Then tried to make a chevron pattern. Two hours later, I had the table top taped off, but still not quite right and painted in the second color. I went to bed and dreamed of all the glorious chevron projects I've seen in the blogosphere and couldn't wait to see my final product. 

I took the tape off the next morning and to my dimay, the lines weren't even close to being crisp. You may not be able to tell in the pictures, but come on over for an afternoon treat, and I'll show you. The 'smudgy' edges have grown on me and it may even look like I did it on purpose, so the table (that I probably paid more for in supplies to redo, than what it originally cost) will stay as is, and I will enjoy it.

So, that's what I've done with my life recently in the last many months. What do you think? What have you been up to?

Monday, July 11, 2011

Chalkboard Cleaning List

I've had chalkboard paint on my mind for months now! And I've finally made my first chalkboard paint project with hopefully many more to come.


This lovely little frame came from Goodwill and started off looking like this:


I peeled off the backing that was held on with tape and got right to painting the frame.

I used yellow acrylic paint that I had on hand. It took many coats and since I didn't sand the frame down, there are still streaks of the brown that show through the yellow. Luckily I like it this way and it gives it a vintage feel.

Next I headed to Hobby Lobby (I loooove Hobby Lobby) and picked up some chalkboard paint. I wanted to get spray paint but they were fresh out so I settled for some that I had to brush on. Following the directions on the bottle, I applied two coats of paint. One horizontal, one vertical with an hour to dry between the two.

In the morning the paint hadn't completely covered the glass, so I applied a third coat. That night I measured the spacing that I wanted the separate lists (Daily, Weekly, Monthly) to have and where each row would be making sure to leave space for the items I forgot and will need to add later. If you look really hard, you can see the pencil markings.
Next I busted out a paint pen and scribbled my cleaning to do list onto the board. I got a bit distracted as we were watching Harry Potter and misspelled Kitchen as Kithen...had to sneak a little C in there as I didn't want to start over!

I decided to hang it in the bathroom as I know I will see it everyday. All I need to do now is purchase chalk and find a way to attach it to the frame, so I don't lose it and start checking off my list!

Sunday, May 01, 2011

Craft Wish List

Hey there!

Check out my new page that shows all the crafty things that have been on my mind lately. Let's get ta craftin'!

Wednesday, April 20, 2011

The Streets of Life

Ever since I came across this piece of wall decor from Pottery Barn I've wanted to make my own (since I don't want to dish out the big bucks for it). But I want it to be huge, like at least 36" x 48" huge. So, I decided to test out a smaller different version.

Now, I'm not quite sure if I came up with this idea all on my own or came across it on one of the many crafty, creative blogs I check out. Either way, I'm quite proud of it! The finished project isn't what I imagined in my head, but how often are ideas implemented exactly they way you first dream up? (Especially when I couldn't describe or draw out what was in my head!)

After a few months of mulling the project over in my head, I finally decided it was time to get down to it! I described what I could to Jesse. I wanted a sign that has the streets that we have lived on filling up the entire canvas, different sizes and directions. He was quite willing to help me out with the project. That got me even more excited. It was off to Hobby Lobby to buy the supplies we didn't have on hand (the canvas and proper paint colors).

As we were in bed one night, trying to get to sleep, we started chatting about it. We listed out the streets to use and then Jesse came up with a brilliant idea. In fact, it is now my favorite part. He said, "What if we try to make the streets into a map?" I was so excited and instantly hoped that the street names and directions of the streets would work well together.

Jesse got a pencil and paper and started testing it out. It worked out pretty easy for us since all but one of the streets (actually a dorm I lived in) are in the same town!

So the design/layout was all in Jesse's hands. I left it up to him to figure out the font and sizes of the words. He made this template in Photoshop and then I printed the words out.

Next I cut out around the words and placed them on the 16" x 20" canvas (just to be sure they fit!). I still didn't have a plan as to how I was going to get the words onto the canvas...I was just going with the flow!

Then it was time to start painting the background. We knew we didn't want it to be a solid color so I took a wide sponge 'brush' and just went crazy slapping paint around in all different directions. I also threw down a few globs of paint on the canvas to give it a bit of texture.

I let it dry overnight and then came back the next day to 'fill in' all the rest so it didn't have too much white spots and let it dry overnight (okay a few more days went by) again.

While paint was drying (or just hanging out waiting for more paint) I figured out how we would get the letters onto the canvas. I used an X-acto knife to cut out all of the letters so I had a stencil. If I were to do this again, I would use cardstock or anything thicker than paper so that the stencil would be more sturdy when painting over it. This did take quite a bit of time, but thanks to my experience at my aunt and uncle's sign shop, I was quite the pro! ;) I'm sure there are plenty of better ways out there but I couldn't come up with anything else that was free and I was so darn excited to complete our piece of art!

We placed the stencils on the canvas, stuck them down with some tape, and started dabbing paint!

This last part was the most difficult for me. It was soooooo hard to wait for the paint to dry before pulling up the paper, but Jesse restrained me. When I took the paper off, we were so happy with the end result. The letters aren't perfect, which ended up being exactly what we wanted. Makes sense now that I think about it. We didn't want the background to be solid and perfect, so why would we want the words to be that way too?

We hung the street art up in our kitchen tonight and I absolutely love it. It represents where we have been and each street name brings back all kinds of memories. And knowing there is never going to be anything exactly like it make me smile. Now it is time to tackle the huge number art canvas!